Easy Origami Shark: Step-by-Step Paper Craft
Origami shark tutorials are incredibly fun, and I’m so excited to guide you through making your very own! Imagine a sleek, powerful shark, its triangular dorsal fin standing proud, its tail ready to propel it through imaginary waters. This project is perfect for complete beginners and kids, and it’s a fantastic little decoration or even a unique handmade gift. We’ll have this aquatic friend ready in about 10-15 minutes!
Throughout this tutorial, you’ll learn fundamental origami folds like mountain and valley folds, as well as how to create sharp creases that bring our shark to life. Grab a sheet of paper, and let’s dive in to create something amazing together!
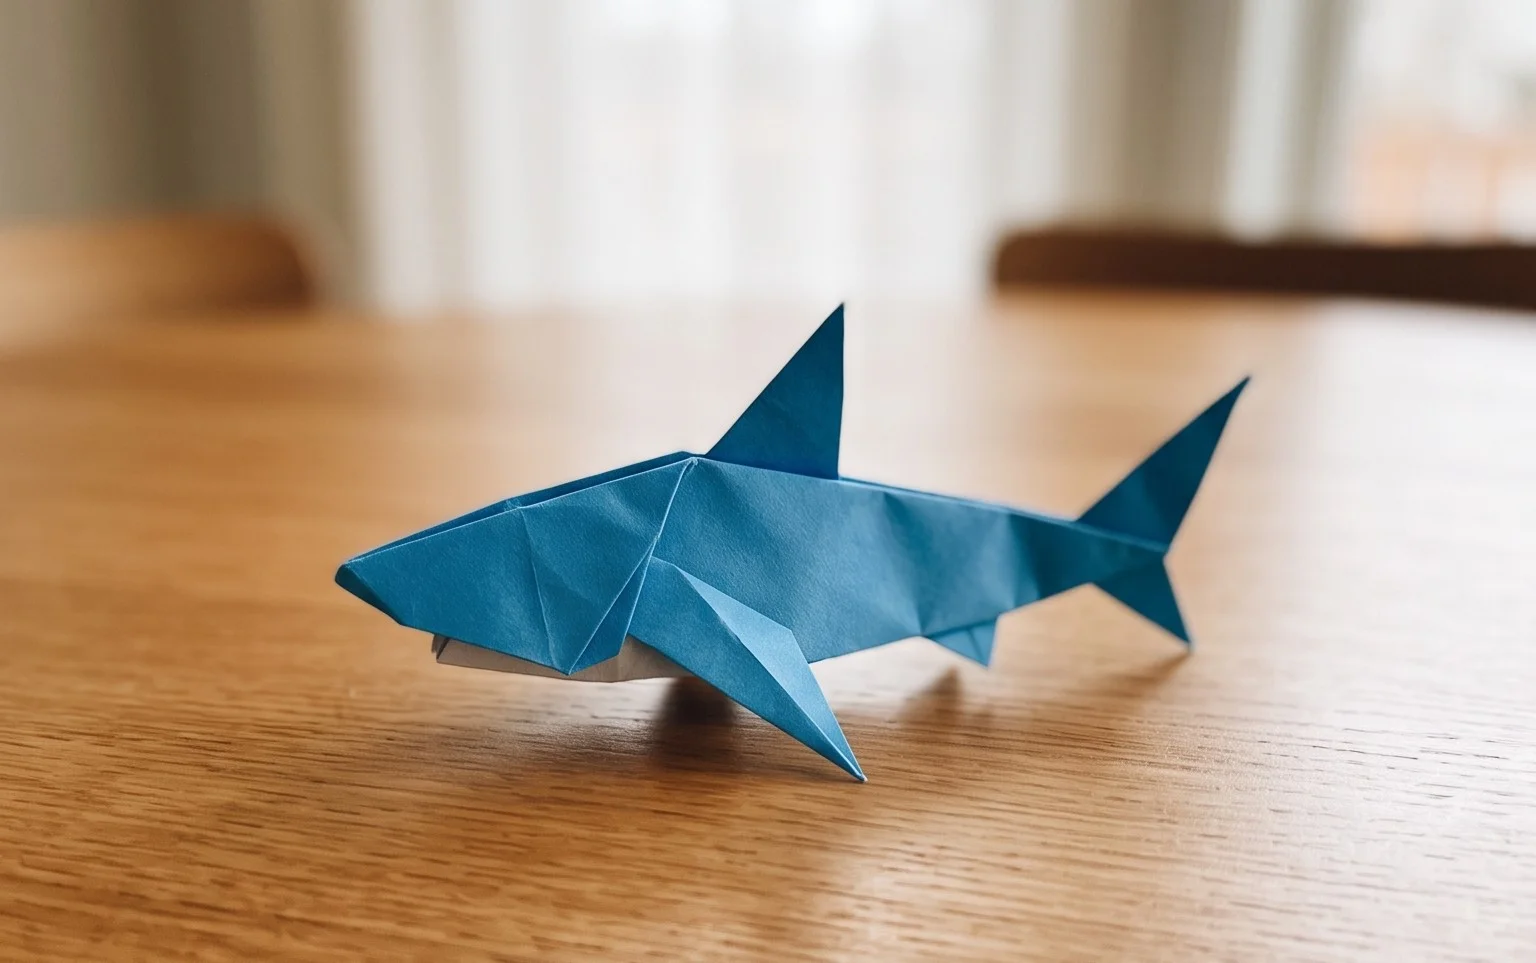
Origami Shark: Step-by-Step Instructions
Hello there, budding origami artists! Today, we’re going to dive into the exciting world of origami and create something truly magnificent: a fearsome (but friendly!) origami shark. I love making this shark because it’s a fantastic intermediate-level model that really rewards careful folding. It looks impressive, but it’s actually quite achievable with a little patience. Let’s get started and bring this ocean predator to life, one crease at a time!
Choosing Your Paper
The paper you choose can make a big difference in how your origami shark turns out. For this model, I generally recommend using:
- Type: Standard origami paper is ideal. It’s specifically designed for folding, meaning it holds creases well and is thin enough to manage multiple layers. If you don’t have dedicated origami paper, any thin, crisp paper will work. Avoid thick cardstock or construction paper, as these can be difficult to fold precisely and will result in a chunky model.
- Weight: Aim for a weight between 70 gsm (grams per square meter) and 90 gsm. This is a good balance – not too flimsy, not too stiff.
- Size: A square piece of paper between 6 inches (15 cm) and 8 inches (20 cm) is a great starting point for beginners. Larger paper can be more forgiving, while smaller paper allows for more intricate detail once you’re comfortable.
- Single or Double-Sided: This is where you can have some fun! For a classic shark look, I usually use single-sided paper with a colour on one side (like grey or blue) and white on the other. When we fold the shark, the white will become its belly, creating a lovely contrast. However, if you have double-sided paper in two complementary colours, you can create a wonderfully unique shark! Imagine a blue top and a white bottom, or even a metallic silver and a dark grey. The choice is yours!
Essential Base Folds
Before we get to the shark itself, we need to master a couple of fundamental origami folds. Practicing these will make the entire process much smoother. We’ll be using the “preliminary base” and the “kite base” extensively.
Making the Preliminary Base
This is one of the most common bases in origami and is the foundation for many models.
- Start with your square piece of paper, coloured side up if you’re using single-sided paper.
- Fold the paper in half diagonally by bringing one corner to meet the opposite corner. Crease firmly. Unfold.
- Now, fold the paper in half diagonally again, bringing the other two opposite corners together. Crease firmly. Unfold. You should now have an ‘X’ crease on your paper.
- Flip the paper over so the white side is facing up.
- Fold the paper in half horizontally by bringing the bottom edge up to meet the top edge. Crease firmly. Unfold.
- Fold the paper in half vertically by bringing the left edge over to meet the right edge. Crease firmly. Unfold. You should now have a ‘+’ crease on the white side, and the ‘X’ crease on the coloured side.
- Now for the magic! With the white side still up, gently push the left and right edges inwards towards the center. The existing creases will guide the paper. As you do this, the top point will naturally want to collapse downwards. Bring the top point down to meet the bottom point. You should end up with a smaller square with four flaps. This is your preliminary base. Make sure all your creases are sharp and neat – this will help enormously in the later steps.
Making the Kite Base
This base resembles a kite and is used to shape fins and other pointed elements.
- Start with a square piece of paper, coloured side up.
- Fold the bottom edge up to meet the top edge, then unfold.
- Fold the left edge over to meet the right edge, then unfold. You should have a horizontal and a vertical crease.
- Take the bottom right corner and fold it inwards so the bottom edge aligns perfectly with the vertical center crease. Crease firmly.
- Repeat with the bottom left corner, folding it inwards so the bottom edge aligns with the vertical center crease. Crease firmly. You should now have a shape that looks like a kite.
The Folding Sequence: Bringing Your Shark to Life
Now that we’re familiar with the basics, let’s begin folding our shark! We’ll start by creating the preliminary base and then proceed to shape our aquatic predator.
- Begin with your preliminary base from above, with the open end pointing towards you and the closed point facing away. The coloured side should be on the outside.
- Take the top flap on the right side and fold its bottom edge inwards to meet the vertical center crease. Crease well.
- Repeat with the top flap on the left side, folding its bottom edge inwards to meet the vertical center crease. Crease well. This looks like you’re making a kite shape on the top layer.
- Now, take the very top triangular point that you’ve just folded in and fold it downwards, so its tip touches the bottom point of the ‘kite’ you just created. Crease firmly.
- Unfold the folds you just made in steps 2, 3, and 4. You should see the creases on the top layer.
- Now, we’re going to do a “petal fold” on the top layer. Lift the entire flap you just unfolded (the one that had the creases from steps 2-4) upwards. As you lift, the side edges should naturally want to fold inwards along the creases you just made. Gently guide them inwards, flattening the flap upwards. The result should be a diamond shape on the top layer. This is a crucial step for forming the shark’s head.
- Flip the entire model over.
- Repeat steps 2 through 6 on this side. You should now have a symmetrical diamond shape with two flaps on each side.
- Rotate the model so that the two ‘legs’ or points at the bottom are pointing downwards.
- Take the right flap and fold its bottom edge inwards to meet the vertical center crease. Crease firmly.
- Repeat with the left flap, folding its bottom edge inwards to meet the vertical center crease. Crease firmly. These two flaps will form the shark’s tail.
- Now, fold the entire model in half upwards, bringing the bottom point up to meet the top point. Crease firmly. You will have a long, thin shape.
- This is where we start to define the shark’s body and tail. Take the right side of the model and fold it downwards at an angle, about halfway up the length of the model. This fold will create the shark’s tail fin. The angle of this fold will determine the sweep of your tail. Crease firmly.
- Flip the model over and repeat step 13 on the other side, mirroring the fold you just made. You should now have two angled flaps that form the tail.
- To make the shark’s head and mouth, take the very tip of the front end (the point that’s furthest away from the tail) and fold it downwards a small amount. This creates a slight angle for the snout. Crease firmly.
- Now, on the underside of the snout, make a small fold upwards. This creates the shark’s mouth. The size of this fold will dictate how prominent the mouth is. Crease firmly.
- To give the shark some depth and dimension, gently pull the body apart slightly. You can also bend the body a little to give it a curved, swimming appearance.
- Finally, gently shape the tail fins. You can fold them slightly outwards or inwards to give them a more natural look.
Common Pitfalls and How to Avoid Them
Don’t worry if your first few attempts aren’t perfect! Origami is a skill that improves with practice. Here are a couple of common places beginners tend to stumble and how to overcome them:
- Fuzzy or Inaccurate Creases: The biggest culprit here is not pressing down firmly enough on your folds, or not aligning edges and corners perfectly before creasing. To avoid this: After each fold, use your fingernail or a bone folder (if you have one) to run along the crease and make it super sharp. Always take a moment to ensure corners meet exactly and edges line up before you commit to the crease. Precision early on saves a lot of headaches later!
- The Petal Fold Confusion: Step 6, the petal fold, can be tricky for newcomers. It relies on the existing creases to guide the paper. To avoid this: After unfolding in step 5, really look at the creases. They create natural ‘valleys’ and ‘mountains’. When you lift the flap in step 6, imagine those creases are guiding the paper where to go. Don’t force it; let the creases do the work. Gently coax the sides inwards as you lift. Watching a video demonstration of this specific fold can be incredibly helpful if you’re struggling.
- Misinterpreting Left/Right or Top/Bottom: Sometimes, especially when flipping the model over, it’s easy to get disoriented. To avoid this: Always reorient your paper before starting a new set of steps after flipping. If a step says “take the right flap,” make sure you’re looking at what is now the right flap from your current perspective. Mentally visualize the finished shape as you go.
Varying Your Origami Shark
Once you’ve mastered the basic shark, the fun really begins with customization! Here are some ideas:
- Size: Obviously, using larger or smaller squares of paper will result in larger or smaller sharks. Experiment with different sizes for different effects. Small sharks are great for decorations, while larger ones can be statement pieces.
- Paper Pattern: This is where you can get really creative! Try using patterned origami paper. Think of a fish-scale pattern for a more realistic look, or even a cool geometric design. If you’re feeling adventurous, you could even try printing your own patterns onto plain paper before folding!
- Colour: Don’t stick to just grey or blue. What about a vibrant red shark for a more dramatic look? Or a yellow one for a playful feel? Consider how the colour will interact with the white underside – a black shark with a white belly can be quite striking.
- Adding Details: Once folded, you can use fine-tip permanent markers to add eyes, gills, or even some teeth to your shark. Be careful with this, as it’s permanent!
Displaying and Gifting Your Shark
Your finished origami shark is a work of art, so let’s give it the spotlight it deserves!
- Desktop Companion: A single shark placed on a desk can add a touch of whimsy and personality to your workspace.
- Mobile or Garland: Punch a small hole in the top of the shark (carefully!) and string several together to create a charming mobile or garland. This looks fantastic hung in a child’s room or even as party decorations.
- Part of a Scene: Create a whole underwater diorama! Use blue cardstock as a backdrop, add some seaweed cutouts, and place your sharks swimming amongst them.
- Gift Topper: Pop a small origami shark on top of a wrapped gift for a unique and personal touch. It’s an extra little present for the recipient!
- Party Favors: If you’re having a birthday party or an event with a sea or ocean theme, a collection of small, colourful origami sharks makes for wonderful and eco-friendly party favors.
- Educational Tool: For younger children, a shark model can be a great way to introduce them to marine life and the art of origami.
I hope you’ve enjoyed this journey into the world of origami sharks! Remember, the most important ingredient in origami is patience and a willingness to keep trying. Each fold you make is a step closer to mastering this beautiful art form. Happy folding!
Conclusion
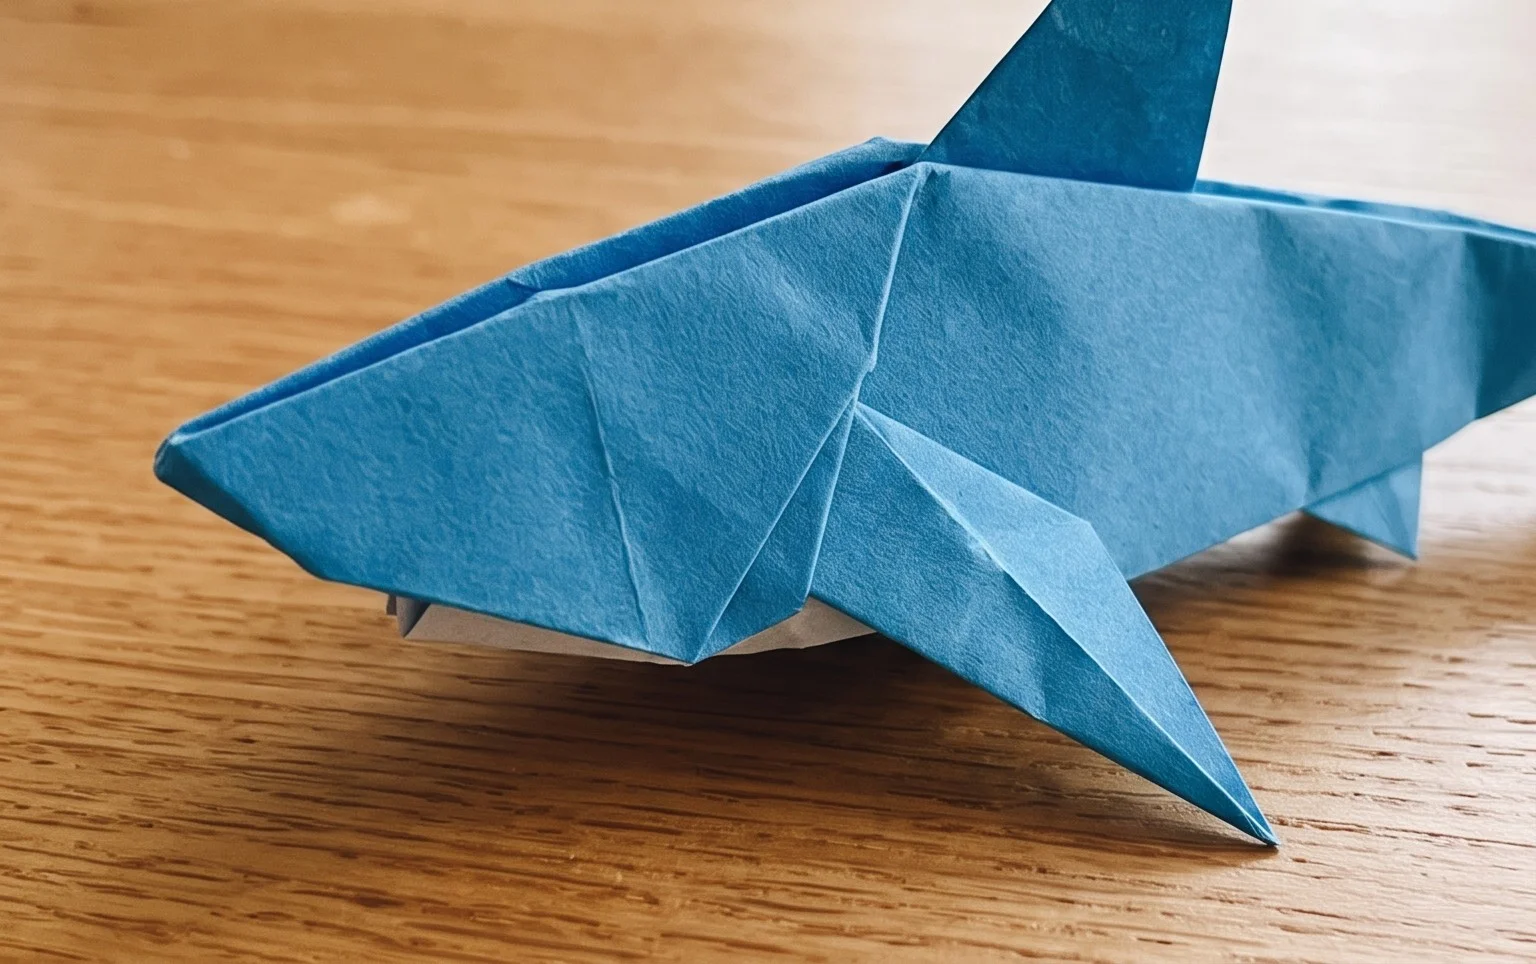
Congratulations on completing your origami shark! We hope you enjoyed this fun and relatively simple folding adventure. Don’t worry if your first origami shark isn’t perfect; every fold is a step towards mastery, and practice makes progress. We encourage you to try this origami shark again, perhaps with different paper for a unique look. Share your magnificent creation with friends and family – they’ll be impressed!
For your next challenge, consider trying a different aquatic creature like an origami fish or a graceful origami whale. The world of paper folding is vast and exciting! Come back and explore more paper projects with us soon.
