Easy Origami Eagle: Step-by-Step Paper Craft
Origami Eagle: Step-by-Step Instructions await your eager hands! Get ready to transform a simple square of paper into a majestic bird of prey, complete with outstretched wings and a proud, sharp beak. This impressive origami eagle is a fantastic project for complete beginners and older kids alike. It’s perfect for adding a touch of wild elegance to your desk or shelf, or even as a thoughtful handmade gift. You can expect to complete this soaring creation in about 15-30 minutes. Throughout this tutorial, you’ll master essential origami folds like mountain and valley folds, learn to create crisp points for the wings and tail, and discover how to bring your eagle to life with subtle shaping. Let’s get folding and unleash your inner sculptor!
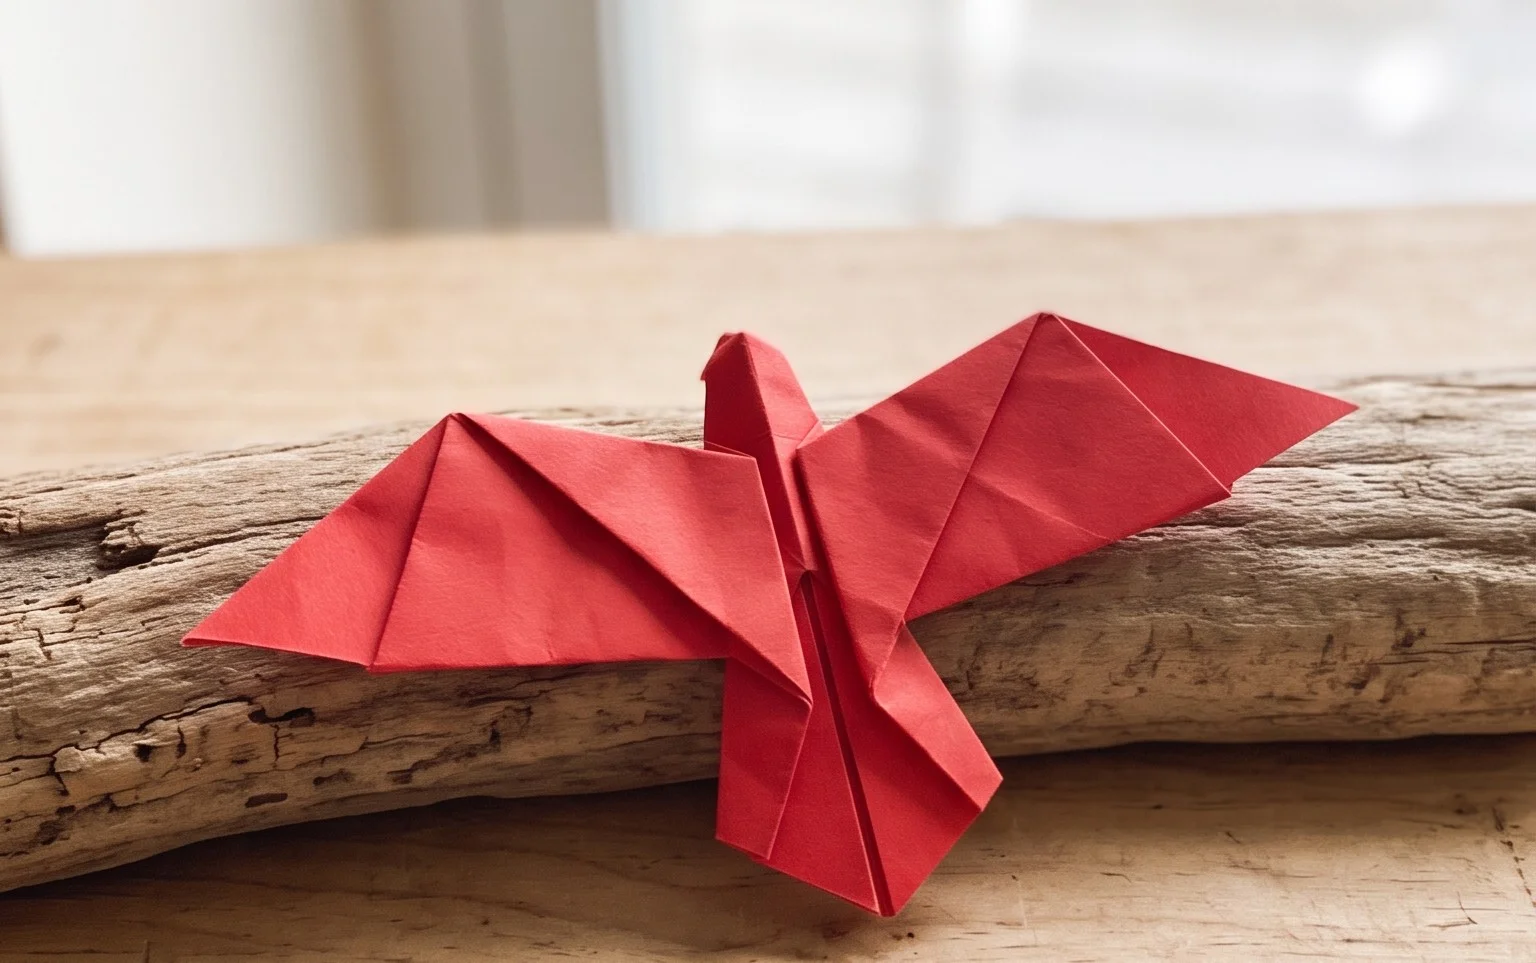
Origami Eagle: Step-by-Step Instructions
There’s something truly majestic about an eagle, a symbol of power and freedom. Capturing that spirit in paper through origami is a wonderfully rewarding project. This tutorial will guide you through creating your own origami eagle, fold by careful fold. We’ll cover everything from choosing the right paper to displaying your finished masterpiece. Don’t worry if you’re new to origami; I’ll explain each step in plain language, focusing on clear instructions so you can follow along without needing diagrams. Let’s begin this soaring adventure!
Choosing Your Paper
The foundation of any good origami model is the paper. For an origami eagle, you have a few excellent options.
* Type of Paper: Standard origami paper is the best choice for beginners. It’s thin enough to allow for multiple folds without becoming too bulky, yet strong enough to hold its shape. If you don’t have dedicated origami paper, thin printer paper can work in a pinch, but it might be a bit stiffer. Avoid cardstock or thicker craft papers as they’ll be too difficult to fold precisely.
* Weight: Origami paper typically ranges from 60 gsm (grams per square meter) to 90 gsm. For an eagle, a weight in this range is ideal. It provides enough structure without being overly stiff.
* Size: For your first eagle, I recommend starting with a square piece of paper that is at least 6 inches (15 cm) by 6 inches (15 cm). Larger paper is generally easier to handle and fold precisely, especially when you’re learning. Once you’re comfortable, you can experiment with smaller sizes.
* Single or Double-Sided: This is where you can get creative! A single-sided paper, where one side is colored and the other is white, will result in an eagle with a colored body and white wings or underbelly. This can create a striking contrast. If you want a uniformly colored eagle, use double-sided origami paper where both sides are the same color. For a more natural look, consider using brown or tan paper for the main body and perhaps a lighter shade for the underside if using single-sided paper.
Essential Base Folds and How to Make Them Cleanly
Before we start folding our eagle, let’s ensure we’re comfortable with a couple of fundamental origami folds. Practicing these will make the entire process smoother.
* The Valley Fold: This is when you fold a piece of paper so the crease forms a “valley” shape. Imagine bringing one edge or corner to meet another. When you press down along the fold line, it creates an inward crease.
* The Mountain Fold: This is the opposite of a valley fold. The crease forms an “upward” ridge, like a mountain peak. You achieve this by folding the paper away from you along a designated line.
The key to clean folds, regardless of whether it’s a valley or mountain fold, is precision and pressure. Always align edges and corners as perfectly as possible before making your crease. Run your fingernail or a bone folder (if you have one) firmly along the folded edge. This makes the crease sharp and defined, which is crucial for the later steps of the origami eagle where accuracy will make a big difference.
The Fold Sequence: Your Origami Eagle Takes Flight
Let’s begin folding! I recommend starting with the colored side of your paper facing up if you want that color to be predominantly on the outside of your eagle.
1. Start with your square piece of paper, colored side up, positioned like a diamond in front of you.
2. Fold the paper in half diagonally by bringing the bottom corner up to meet the top corner. Crease firmly. Unfold.
3. Now, fold the paper in half diagonally the other way, bringing the left corner to meet the right corner. Crease firmly. Unfold. You should now have two diagonal creases forming an ‘X’ on your paper.
4. Flip the paper over so the white side is facing up.
5. Fold the paper in half horizontally by bringing the bottom edge up to meet the top edge. Crease firmly. Unfold.
6. Fold the paper in half vertically by bringing the left edge over to meet the right edge. Crease firmly. Unfold. You will have creases forming a grid.
7. Now, we’re going to make a preliminary base. Bring the left and right corners of the paper inwards towards the center, using the diagonal creases as guides. As you do this, the top point will naturally come down. Flatten the paper into a smaller square. This is called a Square Base. Ensure the open edges are at the bottom.
8. With the open edges of the Square Base pointing towards you, take the right flap and fold its bottom edge to meet the center vertical crease. Crease firmly.
9. Repeat step 8 with the left flap, folding its bottom edge to meet the center vertical crease. Crease firmly. You should now have a kite shape on the front.
10. Flip the paper over.
11. Repeat steps 8 and 9 on this side. Fold the right flap’s bottom edge to the center crease, and then the left flap’s bottom edge to the center crease. You will have a kite shape on both sides.
12. Now, take the top triangular flap on the right side and fold it downwards, aligning its point with where the two kite flaps meet at the bottom. Crease firmly.
13. Repeat step 12 with the top triangular flap on the left side. Crease firmly.
14. Flip the paper over.
15. Repeat steps 12 and 13 on this side. Fold the top right flap down, and then the top left flap down.
16. Now, we’re going to open up the folds we just made. Carefully unfold the four triangular flaps you folded down in steps 12-15.
17. This is a crucial step for forming the bird base. You’ll see existing creases. Lift the bottom point of the paper upwards. As you lift, use the creases you just made to help guide the paper. The sides will naturally come inwards. Flatten the paper down into a new shape. This new shape will have two points at the top and two points at the bottom, with the open edges now at the top. This is the Bird Base. Make sure the closed point is facing downwards.
18. With the Bird Base in front of you, and the open edges pointing upwards, take the right flap (which is now a long, pointed section) and fold its bottom edge to meet the center vertical crease. Crease firmly. This will be one of the eagle’s wings.
19. Repeat step 18 with the left flap. Fold its bottom edge to the center vertical crease. Crease firmly. This will be the other wing.
20. Flip the entire model over.
21. Repeat steps 18 and 19 on this side. Fold the right flap’s bottom edge to the center crease, and then the left flap’s bottom edge to the center crease.
22. Now, we need to shape the head and tail. Look at the two long, pointed sections sticking upwards. One of these will become the head, and the other the tail.
23. Take the right-hand pointed section and perform an inside reverse fold. To do this, you’ll first gently open up the fold you just made for the wing slightly. Then, push the point inwards between the layers of paper, folding it so it emerges upwards at an angle. This fold will form the eagle’s head. Aim for a gentle curve or a sharp beak depending on your preference. Crease firmly.
24. Now, take the left-hand pointed section. This will be the tail. You can choose to leave it as is for a sleek tail, or you can also perform an inside reverse fold similar to the head, but angling it backwards. This creates a more distinct tail. Crease firmly.
25. To form the wings, gently pull down the large flaps on either side. You can adjust the angle to make them look more dynamic.
26. You can also gently curve the wings by running your finger along their underside to give them a more natural, aerodynamic look.
Where Beginners Often Go Wrong (and How to Avoid It)
It’s completely normal to encounter a few tricky spots when learning origami. Here are some common pitfalls for this eagle model and how to navigate them:
* Not Aligning Corners and Edges Perfectly: This is the number one cause of imprecise models.
* How to Avoid: Take your time at every step. Don’t rush to crease. Look closely at your corners and edges. Are they perfectly matched? If not, gently adjust them before pressing down on the fold. A slight misalignment early on can compound and make later steps impossible.
* Making Creases Too Lightly: Weak creases lead to a floppy and undefined model.
* How to Avoid: Once you’ve aligned your paper, use the firm pressure of your fingernail or a bone folder to make your creases sharp and defined. This is especially important for the preliminary base and bird base, as these folds provide the underlying structure for the entire model.
* Struggling with the Inside Reverse Fold (for the Head and Tail): This fold can be a bit counter-intuitive at first.
* How to Avoid: Don’t be afraid to gently open up the paper slightly to see where the fold needs to go. Imagine you’re making a mountain fold from the inside. The key is to guide the point inwards between the existing layers of paper. Practice this fold a few times on scrap paper before applying it to your eagle. It takes a little getting used to!
Varying Your Origami Eagle
Once you’ve mastered the basic eagle, you can have a lot of fun experimenting with variations:
* Size: As mentioned, start with a larger sheet and then try smaller ones for a miniature eagle. Be aware that very small paper will require more dexterity.
* Paper Pattern: Explore patterned origami paper! Designs featuring feathers, wood grain, or even abstract patterns can add incredible detail and character to your eagle.
* Color: Beyond solid colors, try gradient papers or even papers with metallic finishes for a regal look. For a more naturalistic eagle, consider using a combination of brown and white paper, strategically folding so the white shows on the underside of the wings or the chest.
Displaying and Gifting Your Origami Eagle
Your finished origami eagle is a work of art! Here are some ideas for showcasing it:
* Desk Buddy: Place your eagle on your desk as a constant reminder of strength and focus.
* Mobile: String several eagles together with fishing line or thread to create a captivating mobile that will drift gently in the breeze.
* Part of a Scene: Use your eagle as a focal point in a larger origami diorama, perhaps with paper trees or mountains.
* Gift: An origami eagle makes a thoughtful and unique gift for anyone who appreciates its symbolism. Wrap it carefully in tissue paper or a small box. You can even add a handwritten note explaining the symbolism of the eagle.
Creating an origami eagle is a journey that rewards patience and precision. Each fold brings you closer to a magnificent creation. Enjoy the process, embrace any challenges as learning opportunities, and take pride in the beautiful eagle you’ll bring to life from a simple sheet of paper. Happy folding!

Conclusion
Congratulations on folding your very own origami eagle! We hope you enjoyed this journey through paper folding. Don’t worry if your first eagle isn’t perfect – every fold is practice, and you’ll get even better with each creation. We’d love to see your magnificent eagle! Consider sharing a photo with friends or family. Ready for your next challenge? Try folding a more intricate crane or a majestic dragon next! There are so many wonderful paper projects waiting to be discovered. Keep exploring the art of origami!
