Easy Origami Sofa: Step-by-Step Paper Craft Tutorial
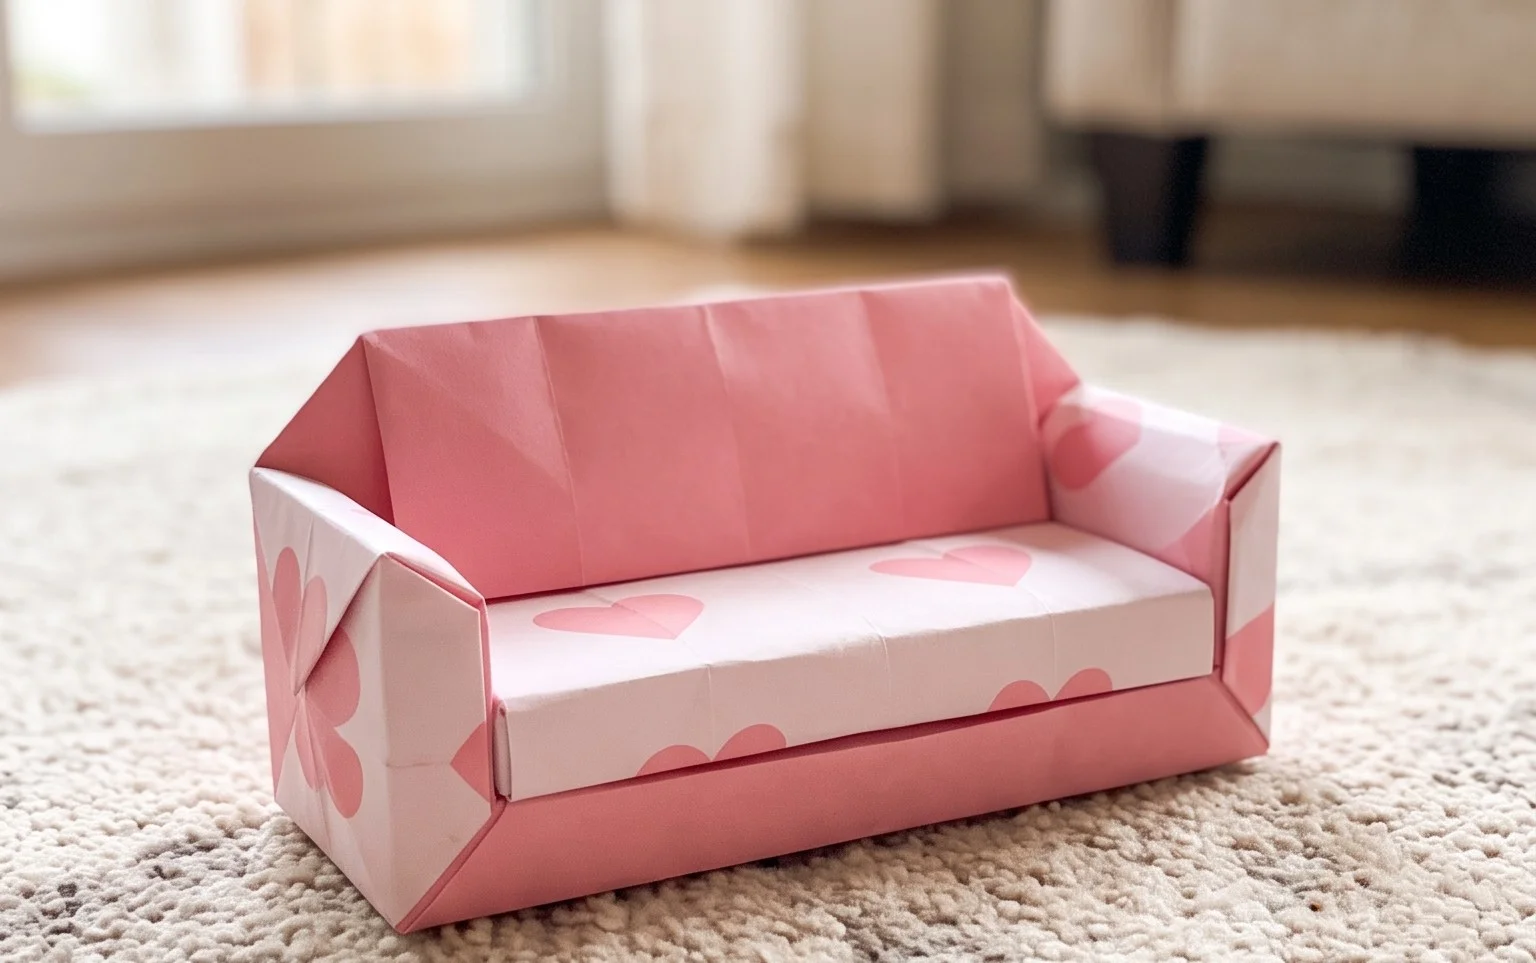
How to Fold an Origami Sofa is a delightful project that brings a touch of miniature comfort right to your fingertips! Imagine a charming little sofa, complete with a cozy seat and backrest, all crafted from a single sheet of paper. It’s the perfect size for display on a desk or shelf, or even as a sweet, handmade gift for a friend. This tutorial is absolutely perfect for complete beginners and kids alike, and you’ll be amazed at how quickly it comes together – we’re talking about a fun 10-15 minute craft!
In this easy-to-follow guide, you’ll learn fundamental origami folds like mountain and valley folds, as well as simple base folds that form the structure of our tiny furniture. Get ready to transform a flat piece of paper into something truly special. Let’s get folding!
Let’s Fold a Cozy Origami Sofa!
Hello, origami enthusiasts! Today, we’re going to embark on a delightful journey to create a charming little origami sofa. This project is perfect for beginners looking to try something a little more structured than a simple crane, but still manageable and rewarding. We’ll go through each step with care, ensuring you can follow along even without visual aids. Get ready to transform a simple sheet of paper into a miniature piece of furniture!
Choosing Your Paper: The Foundation of a Great Sofa
The paper you choose is more important than you might think for any origami model, and our sofa is no exception. For this project, I recommend a standard origami paper, often called “kami.”
Type: Kami is ideal because it’s thin enough to fold cleanly multiple times without becoming bulky, yet strong enough to hold its shape. It also has a crispness that makes for satisfying folds. If you can’t find dedicated origami paper, a good quality printer paper can work, but it might be slightly thicker and require more effort to crease.
Weight: Standard origami paper is usually around 70-80 gsm (grams per square meter). This weight strikes a perfect balance for our sofa. Avoid very thin paper, like tissue paper, as it will be too fragile, and very thick cardstock, which will be impossible to fold neatly.
Size: For a beginner-friendly sofa that’s a good size for display, I suggest starting with a square piece of paper that is at least 6 inches by 6 inches (approximately 15 cm by 15 cm). Larger sizes can be easier to handle for your first attempt, giving you more room for error and making the folds more distinct. You can always scale down later once you’re comfortable.
Single or Double-Sided: This is where you can really have fun with your sofa’s appearance!
- Single-sided paper has one coloured or patterned side and one white side. If you use this, you’ll have a lovely coloured sofa with a white interior, which can look quite sophisticated. Make sure the coloured side is facing UP when you begin the main folds if you want the colour to be the exterior of your sofa.
- Double-sided paper has the same colour on both sides, or different colours on each side. This is great if you want a completely coloured sofa or a sofa with a contrasting colour for its interior. For our main steps, if you want the exterior colour to be dominant, start with that colour facing UP.
Essential Base Folds: Building Blocks of Origami
Before we assemble our sofa, we need to master a couple of fundamental folds. Practicing these will make the entire process smoother.
The Valley Fold: This is the most basic fold. You bring one edge or corner to meet another edge or corner, and then crease along the line where they meet. Imagine folding a piece of paper in half so the crease goes *inward* like a valley.
The Mountain Fold: This is the opposite of a valley fold. You fold a piece of paper so the crease goes *outward*, like the peak of a mountain. You’ll often make a valley fold first, and then unfold it, leaving a crease. To turn that valley fold into a mountain fold, you simply reverse the direction of the crease.
Making Clean Folds: This is crucial for a neat final model.
- Align edges and corners precisely. Even a millimeter off can make a difference in later steps.
- Use your fingernail or a bone folder (if you have one) to press down firmly along the crease. Run it along the fold line multiple times to make it sharp and defined.
- Try to fold in one smooth motion rather than fumbling. Take a deep breath, align, and then crease.
The Folding Sequence: Step-by-Step Sofa Construction
Let’s get folding! We’ll assume you’re starting with a square piece of paper, coloured side up if you’re using single-sided paper and want the colour on the outside.
- Start with your square paper coloured side UP if you want the colour to be on the outside of the sofa.
- Fold the paper in half diagonally by bringing the bottom right corner up to meet the top left corner. Crease firmly. Unfold.
- Now, fold the paper in half diagonally the other way by bringing the bottom left corner up to meet the top right corner. Crease firmly. Unfold. You should now have an “X” crease on your paper.
- Flip the paper over so the white side is facing UP.
- Fold the paper in half horizontally by bringing the bottom edge up to meet the top edge. Crease firmly. Unfold.
- Fold the paper in half vertically by bringing the left edge over to meet the right edge. Crease firmly. Unfold. You should now have a “+” crease pattern on this side, and the “X” crease pattern will be visible on the other side.
- Turn the paper back over so the coloured side is UP again. This is important for the next step.
- Using the creases you’ve made, bring the left and right edges inwards towards the centre. The top and bottom edges should naturally fold inwards as well, creating a square shape. This is called a Preliminary Base or Square Base. Essentially, you are collapsing the paper along the existing creases. Gently push the sides in and flatten the top down. You should have a smaller square with open flaps at the bottom.
- With the open end of the square pointing towards you, take the top layer of the right flap and fold its bottom edge to meet the vertical centre crease. Crease firmly.
- Repeat step 9 with the top layer of the left flap, folding its bottom edge to meet the vertical centre crease. Crease firmly. You will now have a kite shape on the top layer.
- Flip the entire model over.
- Repeat steps 9 and 10 on this side. Fold the bottom edge of the right flap to the centre crease, and then the bottom edge of the left flap to the centre crease.
- Now, look at the top point of your model. You’ll see two small triangular flaps pointing upwards. Fold the tip of the right triangle down so its point just touches the bottom point of the kite shape. Crease firmly.
- Repeat step 13 with the left triangle, folding its tip down to just touch the bottom point of the kite shape. Crease firmly.
- Flip the entire model over.
- Repeat steps 13 and 14 on this side. Fold the right triangle tip down, and then the left triangle tip down.
- Now you should have a shape that looks a bit like a diamond with two points at the top. Take the entire model and fold it in half vertically, bringing the right side over to meet the left side. Crease very firmly. This will be the main body of your sofa.
- Hold the model with the folded edge on the left. At the top, you’ll see two layers of paper sticking out. These will become the arms of your sofa. Take the top layer and fold it outwards and downwards, at an angle. This angle determines how the arm looks. Aim for roughly a 45-degree angle, creating a natural-looking armrest. Crease firmly where it attaches to the body.
- Repeat step 18 on the other side. Take the top layer on the left side and fold it outwards and downwards at a similar angle. Crease firmly.
- Finally, lift the front section of your sofa body upwards slightly. This creates the seat cushion. You might need to gently pull it away from the backrest. This is less of a fold and more of an adjustment.
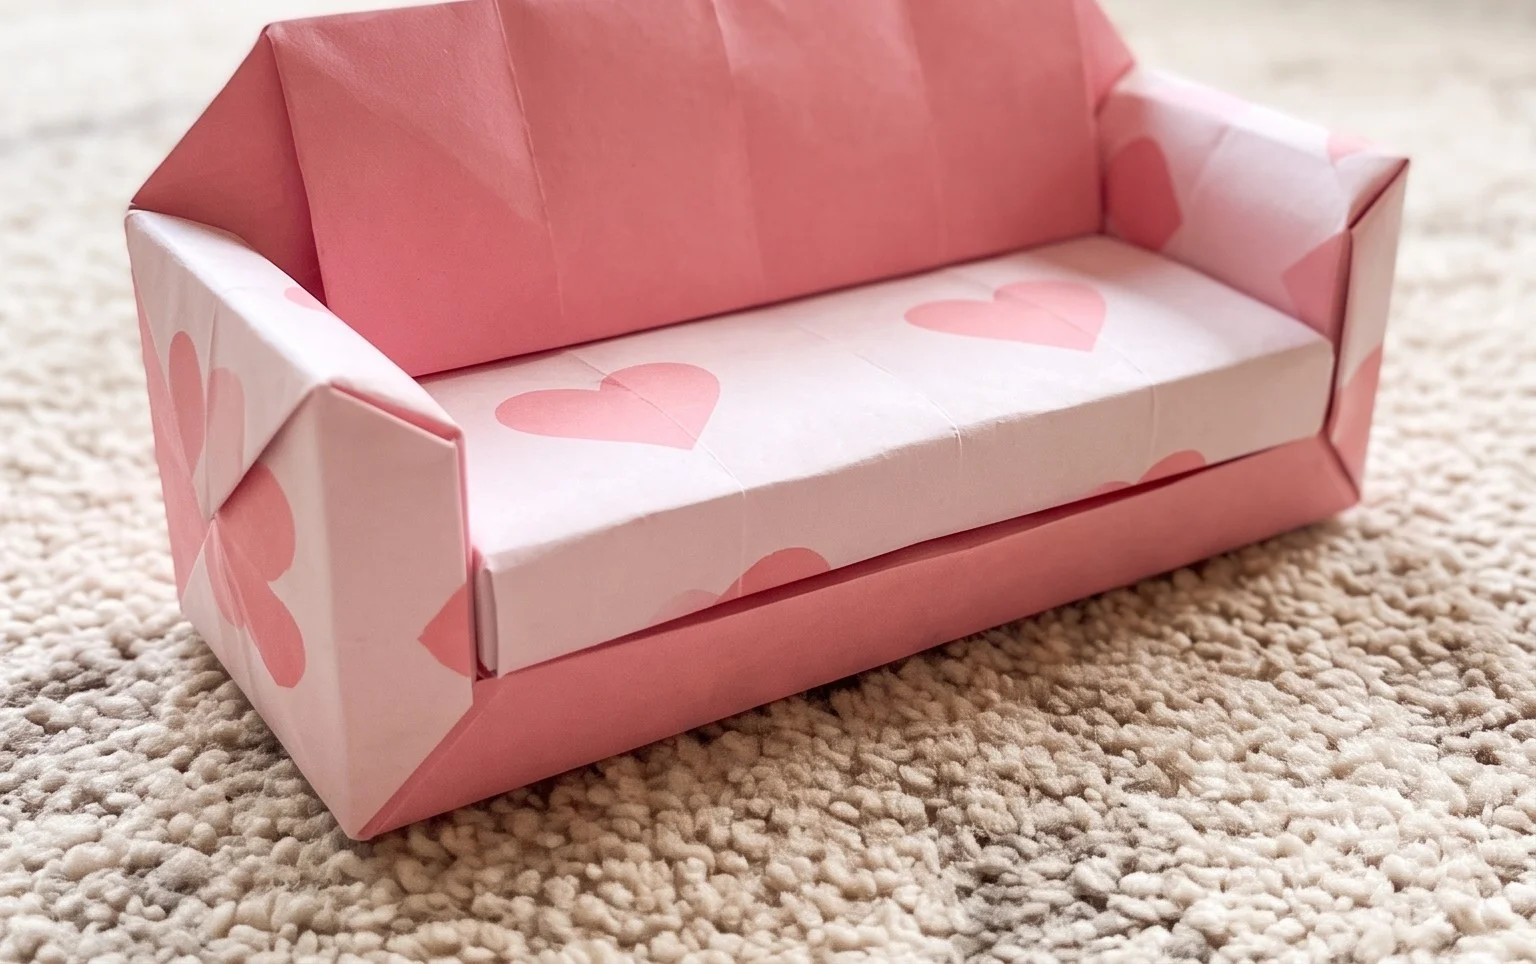
- You now have your origami sofa!
Common Pitfalls and How to Avoid Them
Even experienced folders can make a mistake or two! Here are some common places beginners might stumble and how to navigate them.
1. Bulky Folds at the Square Base (Step 8):
- The Problem: When collapsing the paper into the square base, the multiple layers can sometimes bunch up, making it difficult to get a crisp square.
- How to Avoid It: Ensure you’ve made your initial diagonal and horizontal/vertical creases sharp and accurate. When you collapse, work with the creases. Gently push the left and right sides inwards while simultaneously allowing the top and bottom to come together. Don’t force it; let the creases guide the paper. If it feels stuck, slightly soften a crease a tiny bit or ensure you’re pressing down evenly.
2. Uneven Sofa Arms (Steps 18 & 19):
- The Problem: One arm might be higher, lower, or at a different angle than the other, making the sofa look lopsided.
- How to Avoid It: The key here is symmetry. After folding one arm, pause and look at it. Then, before folding the second arm, try to visually match the angle and position of the first arm. You can even gently hold the first arm in place while you start to fold the second. Crease firmly, but remember you can always gently adjust the angle slightly after creasing if it’s not quite right.
3. A Flat-Looking Sofa (Step 21):
- The Problem: The sofa might look very flat, without a distinct seat and back.
- How to Avoid It: This “fold” is really about shaping. Once the main body is folded (after step 20), you need to gently encourage the front of the sofa to lift. The backrest is already formed by the main body. The seat is created by gently pulling the front panel upwards and away from the backrest. Don’t pull too hard, or you might unfold something! Just a gentle lift to give it dimension. You can also slightly adjust the angle of the arms to create a more inviting look.
Varying Your Sofa: Unleash Your Creativity!
Once you’ve mastered the basic fold, the fun really begins with variations!
Size: As mentioned, start with a larger square for your first few attempts. To make smaller sofas, simply use smaller squares of paper. A 3-inch square will yield a much daintier sofa. The folding technique remains exactly the same.
Paper Pattern: This is where your sofa can go from simple to stunning!
- Use paper with a floral pattern for a feminine touch.
- Try geometric patterns for a modern look.
- Consider paper that looks like wood grain for a rustic feel.
- Chiyogami or Washi paper can add an exquisite, traditional Japanese aesthetic.
Colour: Don’t be afraid to experiment with different colour combinations.
- Use single-sided paper with a bright colour on one side and a complementary colour on the other. When you fold the arms, a different colour will show on the inside of the armrests.
- For a fun two-tone effect, start with a coloured side up, then flip it for the preliminary base fold, and then flip it back for the main body. This can create subtle colour variations.
Displaying and Gifting Your Origami Sofa
Your completed origami sofa is more than just a folded piece of paper; it’s a charming decorative item and a thoughtful gift.
Display Ideas:
- Place it on a bookshelf amongst your favourite books.
- Create a miniature scene by placing it on a dollhouse furniture set or a small diorama.
- Use it as a paperweight on your desk (just be mindful of drafts!).
- Group several sofas together in different colours and patterns for a delightful display on a shelf or mantelpiece.
- It makes a perfect small accent for a potted plant.
Gifting Ideas:
- Present it as a standalone gift for a friend who loves origami or miniature items.
- Nestle it inside a larger gift box as a charming surprise.
- Attach it to a gift tag on a present for an extra special touch.
- Include it with a handwritten card – it shows you’ve put extra care and thought into the presentation.
I hope you’ve enjoyed folding this origami sofa with me! It’s a wonderful way to bring a touch of creativity and whimsy into your day. Happy folding, and I can’t wait to see what beautiful sofas you create!
Conclusion
Congratulations on folding your very own origami sofa! We hope you enjoyed this step-by-step guide. Don’t worry if your first attempt isn’t perfect; every origami artist started somewhere, and practice truly makes perfect. So, give it another go, or proudly display your finished origami sofa! We’d love to see your creations, so feel free to share them with friends and family. For your next folding adventure, why not try folding a miniature armchair or a comfy ottoman? There are so many wonderful paper projects waiting to be discovered, so keep exploring the endless possibilities of origami!