Easy Origami Cherry: Step-by-Step Paper Craft
Origami Cherry! Ready to fold some delightful little blossoms? Imagine a cluster of these sweet, simple origami cherries, their round shapes and tiny stems a charming addition to any corner. This tutorial is perfect for absolute beginners, and kids will love making their own little fruit baskets. In about 15-20 minutes, you’ll have a beautiful, delicate creation that’s wonderful for decorating cards, gifts, or even just as a lovely little desk ornament. We’ll be learning some fundamental folding techniques as we bring these cheerful cherries to life. Let’s get our paper ready and start folding!
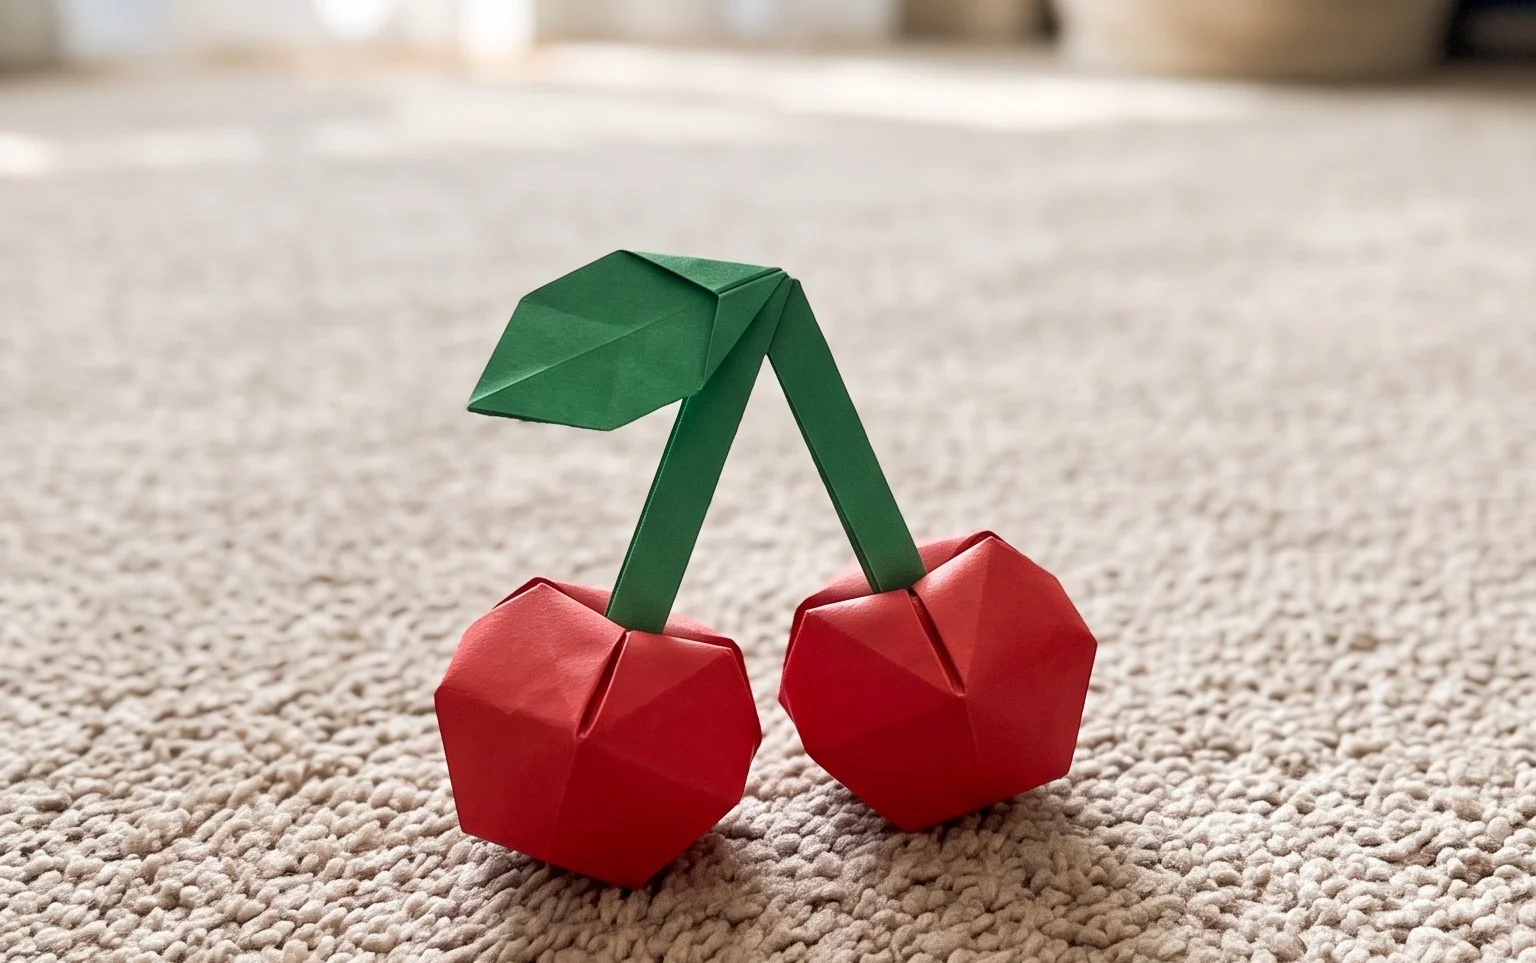
Origami Cherry: Step-by-Step Instructions
Welcome to the delightful world of origami! Today, we’re going to fold a charming little cherry. This model is relatively simple, making it perfect for beginners, and the finished product is incredibly cute. I love making these for little gifts or just to brighten up a desk. Let’s get started!
Choosing Your Paper
The first step in any origami project is selecting the right paper. For our origami cherry, you have a few excellent options.
Paper Type and Weight
The most common and highly recommended paper for origami is called “kami.” This is a thin, crisp paper specifically designed for folding. It holds creases well, doesn’t tear easily, and is generally inexpensive. You can find kami paper in a vast array of colors and patterns. For our cherry, you’ll want paper that’s not too thick, as we’ll be doing several layers of folds. Standard kami paper, typically around 70-80 gsm (grams per square meter), is perfect. Avoid cardstock or thicker craft papers for this model, as they will make the folds difficult and the final shape bulky.
Paper Size
A good starting size for this cherry is a square that’s 6 inches by 6 inches (approximately 15 cm by 15 cm). This size provides enough surface area to work with comfortably, allowing for precise folds, while still resulting in a manageable and attractive cherry size. If you’re feeling confident and want to make larger cherries, you can certainly use larger squares, like 8-inch or even 10-inch squares. Conversely, for miniature cherries, a 3-inch or 4-inch square would work.
Single vs. Double Sided Paper
For this cherry, you have the choice between single-sided and double-sided paper.
Single-sided kami paper has a colored side and a white side. If you use single-sided paper, I recommend starting with the colored side facing *up*. This way, the outside of your cherry will be the color you’ve chosen (like red for a cherry), and the inside, which will be less visible, will be white.
Double-sided paper has the same color on both sides. This is also a great choice if you want your cherry to be entirely colored on the outside. If you use double-sided paper, it doesn’t matter which side you start with facing up.
The Base Folds: Building the Foundation
Before we start shaping our cherry, we need to create a fundamental origami base. For this model, we’ll be using what’s often called a “preliminary base” or “square base.” This is a very common and versatile base in origami. Let’s make these folds precisely, as they will set the stage for the entire cherry.
Creating the Preliminary Base
1. **Start with your square paper, colored side up** (if using single-sided paper).
2. **Fold the paper in half diagonally.** Bring the bottom-right corner up to meet the top-left corner. Crease firmly. You should now have a triangle.
3. **Unfold the paper.** You’ll see a diagonal crease running across your square.
4. **Fold the paper in half diagonally again.** This time, bring the bottom-left corner up to meet the top-right corner. Crease firmly.
5. **Unfold the paper.** Now you should have two diagonal creases intersecting at the center of your square, forming an ‘X’.
6. **Flip the paper over.** The colored side should now be facing down.
7. **Fold the paper in half horizontally.** Bring the bottom edge up to meet the top edge. Crease firmly.
8. **Unfold the paper.** You’ll see a horizontal crease.
9. **Fold the paper in half vertically.** Bring the left edge over to meet the right edge. Crease firmly.
10. **Unfold the paper.** You now have horizontal and vertical creases, along with the two diagonal creases.
11. **Bring the left and right edges inwards.** Hold the paper so the horizontal crease is a valley fold (curving inwards). Gently push the left and right edges towards the center, allowing the top and bottom edges to come together. The diagonal creases will guide this.
12. **Flatten the paper.** You should end up with a smaller square. This is your preliminary base. It has four flaps. Make sure the open end (where all the flaps meet) is pointing towards you. The closed end (where the corners are all together) should be pointing away.
Making Clean Folds
The key to successful origami, especially for beginners, is to make your folds as clean and sharp as possible.
* **Align Edges and Corners:** Before creasing, take a moment to ensure that the edges and corners you are bringing together are perfectly aligned. Even a slight misalignment can lead to an uneven final model.
* **Use Your Fingernail:** After bringing two edges or corners together, run your fingernail along the crease. This will create a sharp, defined line. Don’t be afraid to apply a little pressure.
* **Work on a Hard Surface:** A firm, flat surface like a table or desk is essential. This provides resistance, allowing you to make those crisp folds. Avoid folding on a soft carpet or your lap, as this will result in sloppy creases.
* **Unfold and Refold:** If a crease isn’t quite right, don’t hesitate to unfold it and try again. It’s better to fix a fold early on than to struggle with a distorted shape later.
The Cherry Fold Sequence: A Step-by-Step Guide
Now that we have our preliminary base, let’s turn it into a beautiful cherry!
1. **Position the preliminary base.** Make sure the open end of the square base is pointing towards you, and the closed point is pointing away. You should have four flaps visible.
2. **Fold the right flap upwards.** Take the top layer of the right flap and fold its bottom edge so it meets the center crease of the square base. Crease firmly.
3. **Fold the left flap upwards.** Repeat the previous step with the top layer of the left flap. Fold its bottom edge to meet the center crease. Crease firmly. You should now have two upward-pointing triangular flaps on top of each other, resembling a kite shape on each side of the center line.
4. **Fold the top point down.** Take the very top point of the structure (where all the flaps meet at the closed end) and fold it down so it meets the bottom edge of the kite-shaped flaps you just created. Crease firmly. This fold helps to lock the previous folds.
5. **Unfold the last three folds.** Unfold the two kite flaps and the top point you just folded down. You’ll see the crease marks.
6. **Petal Fold.** This is the most intricate fold so far, but we’ll take it slowly. Lift the *bottom* flap of the paper. Open it up slightly. Using the creases you just made, bring the sides of this flap inwards. The crease you made in step 4 should become a horizontal crease, and the side edges should be folded inwards along their existing creases. Flatten this into a diamond shape. This is called a “petal fold.”
7. **Repeat on the other side.** Flip the entire model over. You should see a similar structure on the back. Repeat steps 2 through 6 on this side. Fold the right flap up to the center, then the left flap up to the center. Fold the top point down to the bottom edge of those flaps. Unfold these three folds. Then, perform the petal fold by lifting the bottom flap, opening it, and bringing the sides inwards along the creases, flattening it into a diamond shape.
You should now have a shape with two long, pointed “legs” at the bottom and a diamond shape at the top on both sides. This is often called a “bird base,” which is another fundamental origami base.
8. **Fold the right outer edge inwards.** Turn the model so the two “legs” are pointing downwards. Take the *right* outer edge of the top layer (the diamond shape) and fold it inwards so it aligns with the center vertical crease. Crease firmly.
9. **Fold the left outer edge inwards.** Repeat with the left outer edge of the top layer. Fold it inwards to align with the center vertical crease. Crease firmly. You’ll now have a narrower diamond shape on top.
10. **Repeat on the other side.** Flip the model over and repeat steps 8 and 9 on this side. Fold the right outer edge to the center, then the left outer edge to the center.
11. **Fold the entire model in half upwards.** Take the bottom point (where the two “legs” meet) and fold it all the way up to meet the top point of the model. Crease very firmly. This will create a long, slender shape.
12. **Fold the model in half again.** This time, fold the model in half horizontally, bringing the right side over to meet the left side. Crease firmly.
13. **Locate the opening.** You should now have a long, thin shape with an opening at one end and a closed point at the other. The opening is where you’ll blow to inflate the cherry.
14. **Gently blow into the opening.** Carefully bring the two halves of the model together. You should see a small hole at the closed end. Place your lips over this hole and give a gentle puff of air. The model should inflate slightly, forming the rounded shape of a cherry. You might need a couple of puffs to get it just right.
15. **Shape the cherry.** Gently pinch and adjust the inflated shape to make it look more like a natural cherry.
Congratulations, you’ve folded an origami cherry!
Common Beginner Pitfalls and How to Avoid Them
It’s totally normal to encounter a few bumps along the road when you’re learning origami. Here are some common places beginners might get stuck, and how to navigate them:
1. Inaccurate Preliminary Base Folds
* **The Problem:** If your initial square base isn’t perfectly symmetrical or has wobbly creases, the subsequent folds will be off, making it hard to achieve the correct shape or to get the petal folds to work.
* **How to Avoid It:** As I mentioned earlier, take your time with the first few diagonal and horizontal/vertical folds. Ensure corners meet corners and edges meet edges precisely before creasing. Use your fingernail for sharp creases. If your square base looks lopsided, it’s worth unfolding and refolding it carefully before moving on.
2. Messy Petal Folds
* **The Problem:** The petal fold can be tricky. If the creases aren’t sharp enough from the previous steps, or if you don’t open the flap enough, you might end up with a crumpled or uneven diamond shape instead of a clean one.
* **How to Avoid It:** Make sure the creases you make *before* the petal fold are very clear. When you lift the bottom flap, open it up sufficiently. Imagine you’re opening a book. Then, carefully guide the sides inwards along their existing creases. Flattening the diamond shape requires gentle but firm pressure. Don’t force it; let the creases guide you. If it’s not perfect the first time, gently unfold and try again, paying close attention to how the paper wants to bend.
### 3. Over-inflating or Under-inflating
* **The Problem:** When you get to the blowing step, some people might blow too hard, causing the paper to burst or distort excessively. Others might not blow enough, and the cherry will remain flat.
* **How to Avoid It:** Patience and gentle puffs are key. Start with a very light puff and see how the model responds. You can always add more air. If it starts to look like it’s about to burst, stop blowing immediately! Conversely, if after a few gentle puffs it’s still flat, try a slightly firmer, but still controlled, puff. The paper should inflate to a gentle, rounded form, not become taut and balloon-like.
## Variations: Making Your Cherry Unique
One of the joys of origami is the endless potential for customization. Our cherry is no exception!
Size
As mentioned earlier, the size of your starting square dictates the size of your finished cherry.
* **Larger Cherries:** Use larger squares (e.g., 8×8 inches or 10×10 inches) for a more substantial cherry, perfect for table decorations or as a standalone ornament.
* **Smaller Cherries:** Use smaller squares (e.g., 3×3 inches or 4×4 inches) for miniature cherries. These are adorable as accents on cards, in craft projects, or strung together as a tiny garland.
Paper Pattern
Kami paper comes in an astonishing variety of patterns.
* **Polka Dots:** Red or pink polka dots on a white background would be incredibly charming and classic for a cherry.
* **Stripes:** Subtle stripes or even ombre paper can add a sophisticated touch.
* **Seasonal Patterns:** For a festive touch, consider papers with small floral motifs or even tiny holiday designs.
* **Textured Paper:** Some kami papers have a subtle texture, which can add a unique tactile quality to your cherry.
Color
While red is the obvious choice for a cherry, don’t be afraid to experiment!
* **Pink or Light Red:** For a slightly softer, sweeter look.
* **Dark Red or Burgundy:** For a richer, more mature appearance.
* **Yellow or Green:** You could even make “unripe” cherries or imaginative variations.
Displaying and Gifting Your Origami Cherries
Finished origami cherries are delightful and versatile!
Display Ideas
* **Bowl of Cherries:** Fold a bunch of cherries in various shades and sizes and display them in a decorative bowl on a coffee table or shelf.
* **Table Scatter:** Place a few cherries randomly on a side table or mantelpiece for a whimsical touch.
* **Mobile or Garland:** String together multiple cherries to create a charming mobile or garland. You can tie them to a piece of thread or string using a fine needle and thread.
* **Desk Buddy:** Place a single, perfectly formed cherry on your desk for a little daily dose of cheer.
* **In a Terrarium or Diorama:** Their small size makes them perfect additions to miniature scenes.
### Gifting Ideas
* **Accompanying a Gift:** Tie a cherry to the ribbon of a gift box for an extra special presentation.
* **Handwritten Notes:** Attach a cherry to a handmade card or a thoughtful note. It adds a lovely, handcrafted element.
* **Party Favors:** For a small gathering or children’s party, a few origami cherries can make sweet and memorable favors.
* **”Sweet Treat” Gift:** Give a small bag of origami cherries as a playful “sweet treat” for a friend who loves crafts or cute things.
* **Seasonal Gifts:** During spring or summer, these are a perfect, lighthearted addition to any gift.
I hope you’ve enjoyed folding your origami cherries with me. They’re a wonderfully rewarding little project, and I hope you have fun making them and finding creative ways to display or gift them! Happy folding!
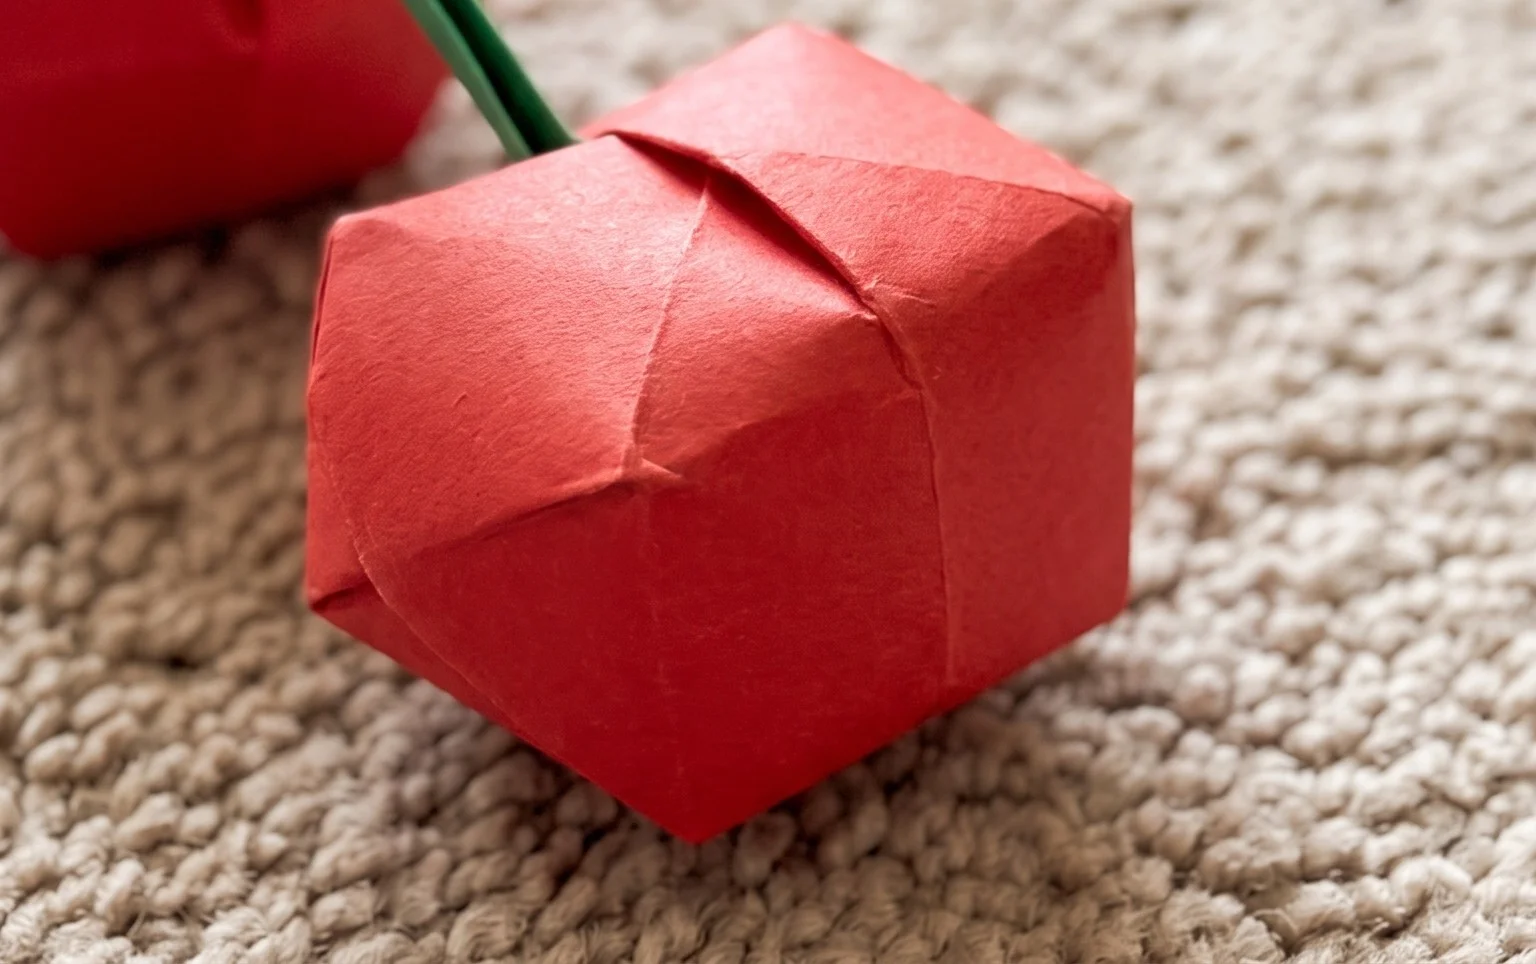
Conclusion
Congratulations on completing your origami cherry! Don’t worry if your first attempt isn’t perfect; every folded piece is a step in learning. Practice makes perfect, and you’ll be creating beautiful origami cherries in no time. We encourage you to share your delightful creations with friends and family – they make wonderful handmade gifts or decorations!
Ready for more? Try variations like using patterned paper for a speckled cherry, or folding a larger one to hold smaller treats. There are so many delightful paper projects waiting for you to discover. Keep folding and keep exploring the wonderful world of origami!
